Tuesday, 2 July 2013

Canada Day Dress, 2013 :)


 "All the nations You have made will come and worship before You, Lord; they will bring glory to Your    Name."

      Psalm 86:9


    For we Canadians, our country's "Birthday" falls on July 1st. The very lovely & talented Erin, of "I heart fabric", inspired me to make a special dress for Canada Day. Erin is from Australia, and believe me, she looked *far* more patriotic than I in her "Aussie Day" getup earlier this year. Check out the link to see her costume, very cool! I got quite a kick out her crimped hair (being a child of the 80's after all ;)

   I honestly didn't have any crazy plans for Canada Day, but I wanted to sew up something for the occasion (any occasion is good enough reason for me to make a new dress ;). I thought it would be nice to make something I could wear throughout the summer as well :) My review on P.R. here

Our Canadian flag :)


I think it would've been nice to incorporate the red maple leaf somehow. I may print one of those "iron-on transfers". I was cutting it close to July 1st as it was however, so I chose a simple red & white theme in a pattern I've already used, McCall's 6243.


McCall's 6243 :)


I made this denim-look, knit fabric, version earlier this year and I liked the pattern a lot. I love the angled seams, and thought it would be a great pattern to use for the red white version I had in mind. My review on PR here.


Chewfoot on my pattern :)

The white cotton/lycra fabric I used seemed a little too transparent, so I interlined the white sections with the same fabric. Too keep the layers from shifting, I gave it a little spray between the layers and then pressed the area lightly (keeping the hairspray can away from the iron, watching out for those explosion warnings! :)


No sooner did I prep my white fabric, did Boris make himself comfortable on the red stuff :) I almost felt guilty shooing him off.


  This McCall's pattern is rated "Easy", and I think that's a fair rating. *However*, if you're using cotton/lycra, it can be testy. The last dress I made with cotton/lycra, behaved very well. I don't know if its because of this fabric's weight (its much lighter weight than the last material I used) but it was a little more challenging to work with. I had to unpick a few (long) seams and resew. I was very determined to finish this project (telling friends and co-workers about your intended project makes me that much more motivated to complete it!).

   One thing I didn't like about this pattern though, is how they instruct you to finish the neckline and armholes. Just a narrow hem. Seems lazy to me :/ I think I'll try a facing next time (and I'm pretty sure there will be a *next* time). This is one of those patterns that, for me at least, is too good just to use once...or twice ;) I used "steam a seam lite 2" on the neckline and armholes and then topstitched with a double needle.


Double needle topstitching :) I was going to use all red, but opted to use white on white, and red on red. After I "steam a seam"ed the armhole and neckline (to hold it in place and give it stability to prevent unsightly "tunnelling"), I topstitched the white areas and then changed the thread to red and topstitched those areas.


*Note* the pattern instructs a 5/8" narrow hem
 (pressing under 5/8" and then turning the raw edge
under to meet the crease, then topstitching. I just
turned the fabric under 5/8", and trimmed the inner layer of white, used "steam a seam"( SAS), then topstitched. By this time it was nearing 2 AM July1st, so I just wanted to be done!


I like the look of this better than contrasting thread, since at the front seam sections I topstitched in red, but the line is just barely noticeable.


Pressed seams before topstitching...


Closeup *after* topstitching. :) It's subtle, but I think it adds a nice touch :)

**I must add: Since I interlined the white areas, to reduce bulk, I pinked the inside layer of white fabric and pressed the outer red and white seam sections open and again, used SAS. I tried topstitching without and I got some puckering (not flattering :/). SAS really made a bit difference!


Here, I show the inside of the dress, white seam allowances pinked and seam pressed open. Then SAS'd it :)


Dress hem with the help of SAS and a double needle :)


I went over to Aunt Isabelle's Canada Day and she was a big fan of my latest creaton ;) She took a few photos to share on FB :)


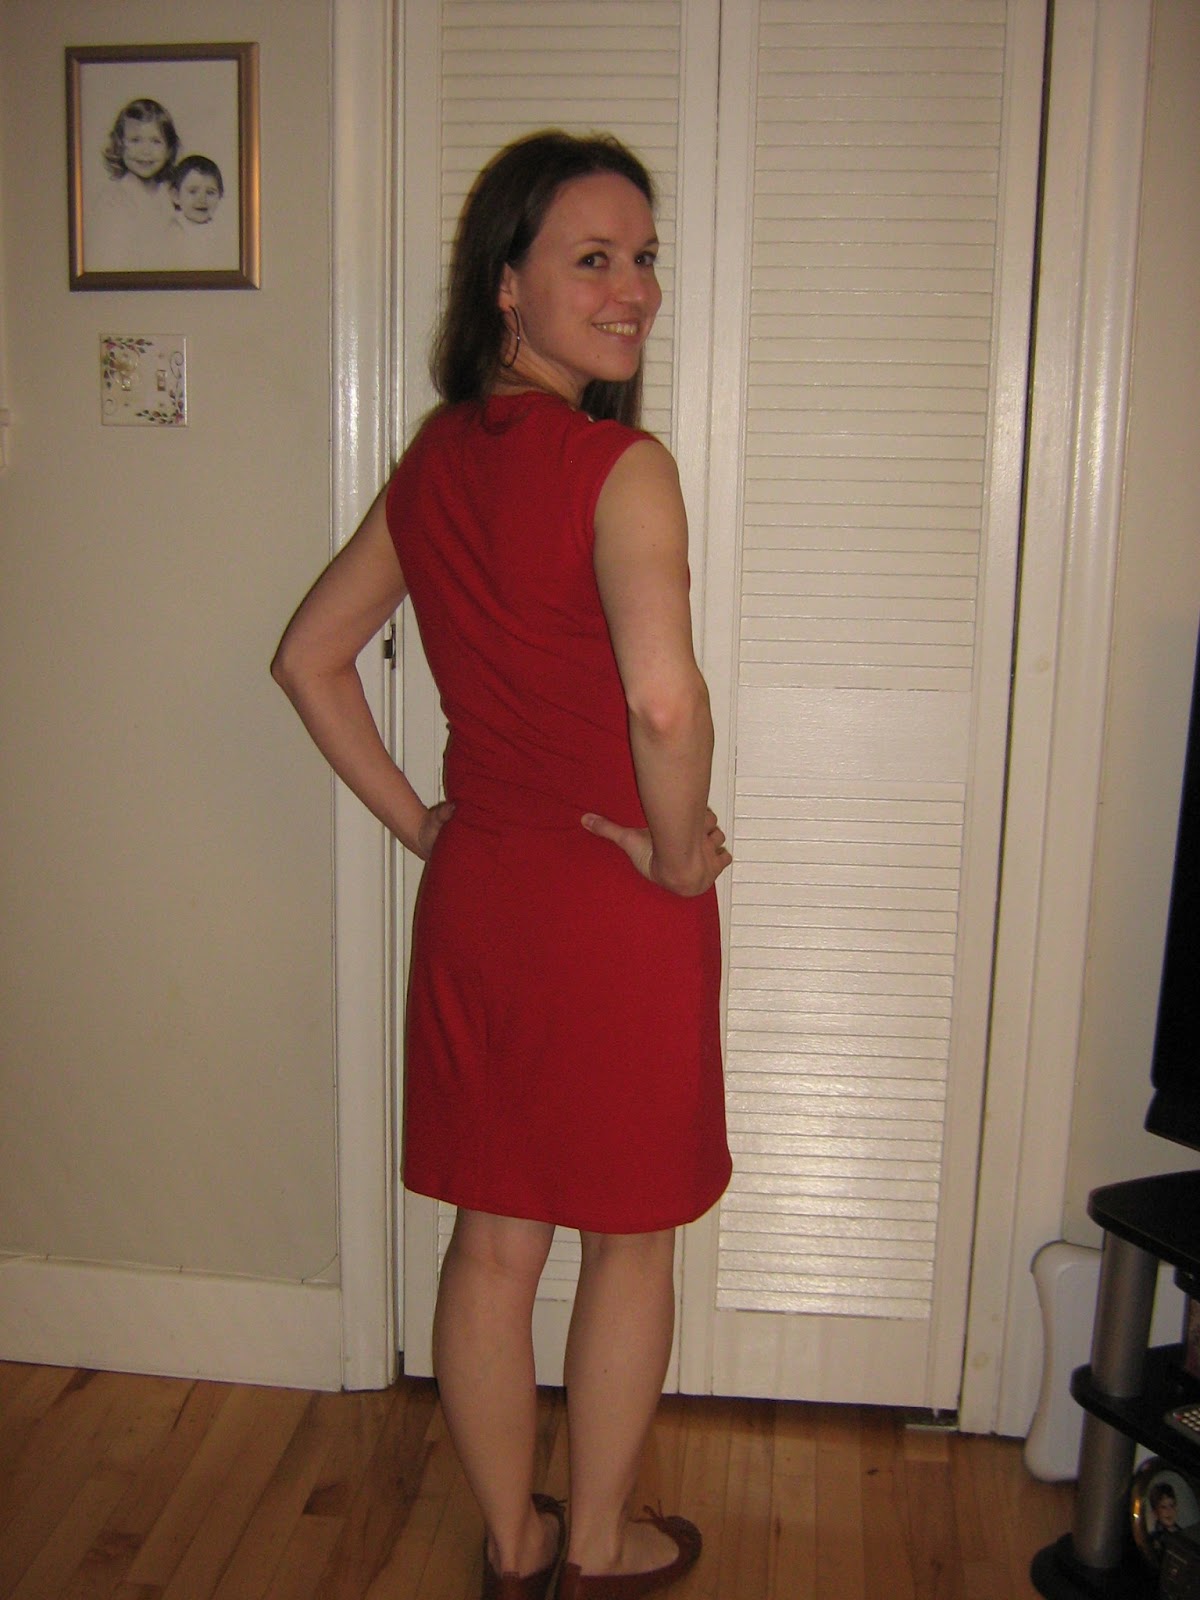


  Dan took the outdoor shots. I'm pretty happy with how this dress turned out. I can say with confidence that I'll be wanting to use this pattern again...and again ;)

Thanks for reading! :)

Monday, 1 July 2013

Fuchsia Simplicity Robe :)


   Can you believe it, this project is not a dress? Not only is it *not* a dress, its not for me either! This beautiful fuchsia robe is for my wonderful Aunt Isabelle :)

   My Aunt Isabelle is quite the lady. She's very generous and kind-hearted, and she has a big soft spot for animals (especially cats, she'll get a kick out of all the included photos of the kitties ;). When she mentioned a few weeks ago that she was looking for a cotton robe, I knew right away I wanted to make her one.

   On that particular day, I was with my mom and Aunt Isabelle at Fabricville. Mom and dad live out of town, and when they come up, we usually hit the fabric store as mom is also a sewer :) One of the store manequins was sporting a white cotton robe with a sailboat theme on it. I overheard my Aunt asking one of the employees if the robe was for sale (it either wasn't or someone had asked to purchase it first). I also overheard my Aunt tell my mom that it was difficult to find a nice robe that was 100% cotton.

      On our way to drop off my Aunt, I tried to discreetly ask some questions about what kind of robe she was looking for (length, if it was the print she liked, etc.). She was very surprised when I gave it to her, so I guess I wasn't too obvious ;). The most important thing to my Aunt Isabelle was finding a robe that was all cotton, as our Canadian summers can get mighty humid :p

     Once we dropped off my aunt, mom and I headed straight back to Fabricville! We decided on some fuchsia cotton. I remember Aunt Isabelle saying in the past how much she liked that particular  colour so we both thought it would be perfect!


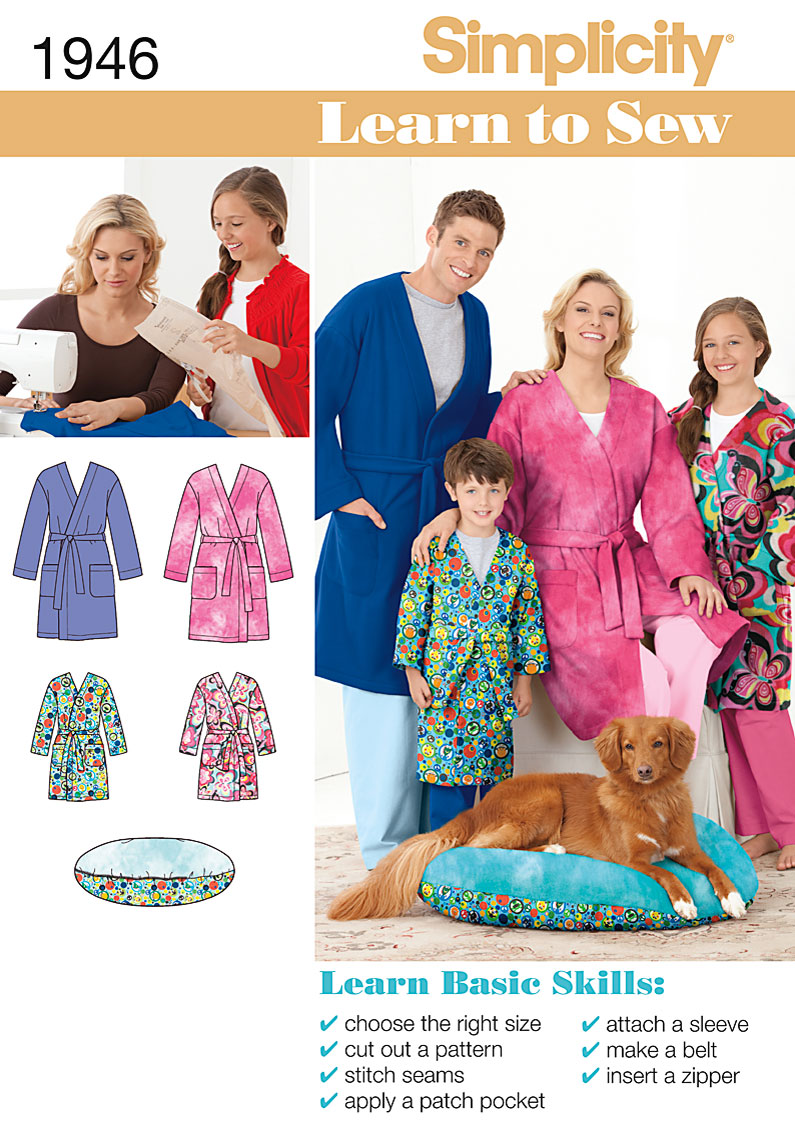
I had this Simplicity robe pattern in my stash, and figured it would work nicely :)


This was one of those "Learn to Sew" patterns by Simplicity. They really hold your hand in this one! It makes for a great pattern for a beginner. They're very encouraging, almost sickeningly so.


My crazy cat, Chewfoot hanging around while I prep the pattern pieces :)

I made some modifications to this pattern. When I laid out the pattern pieces, I realized I didn't purchase enough fabric, so I had to chop off a good 6" off the length of the robe! That was ok, since Aunt Isabelle said she'd like a knee length robe anyway.


    I also decided to modify the sleeves to a more
 "kimono-style" (comparing the sleeve pattern to another pattern I owned made this quite easy). Doing so, I realized that the sleeve length would be *way* too long! I cut off 6", but 5 or 4.5 would've been better so I could've made a sleeve band (or cuff). *Sigh*, oh well!


Boris hanging out too :) I can't resist including photos of the kitties. They amuse me :)


     I think its a bit unnecessary to give a thorough step-by-step detail of how I constructed this very simple robe, but I will mention a few things I did that may be helpful to any blog-readers :)


    First of all, I didn't use a serger, but I wanted the seams to be strong and resist fraying (as this pink stuff frays like crazy!).

This photo to the right is at the shoulder. I cut a  narrow strip of selvedge that I overlock stitched (with an overlock foot on my regular sewing machine) to that seam to help prevent stretching.


 At the side seams, I stitched the seam, then trimmed the seam allowance a bit with pinking shears, and overlocked the edge.

I also treated the seams at the sleeves in the same way.

I used pinking shears a lot in this project, even on the belt before turning it right side out (I did not overlock any seam on the belt though).

For the hem, I pinked the raw edge (though probably not necessary) and did a regular hem.


The pattern instructs you to baste the pockets on before attaching to the robe (so they don't shift while sewing).


I opted to use my sewing buddy, "steam a seam lite 2" instead. I *love* the stuff! It's proven to be  my most useful notion thus far!


  So, at one point I was thinking of only including one pocket instead of both (I had already made both pockets. After asking my husband, Dan, his opinion though, I agreed it would look better with two.

I had attached one pocket and was searching all over the apartment for the other. After about 10 minutes, I looked under Boris (who had made himself comfortable on my sewing chair). I guess I had mindlessly tossed the other pocket there and he was laying on it! :)


 I adjusted the placement of the pockets, since I had taken so much length off the robe. I really like how they turned out :)


The pattern doesn't instruct this, but I stitched a triangle to reinforce the top corners of both pockets.


Overall, I'm pretty happy with how this robe turned out. Knowing my Aunt Isabelle, I figured she would be very gracious about anything I'd make for her (just because it was from her niece :), but I still wanted her to really like it.

Aunt Isabelle was very pleased when I gave her her robe. It was very rewarding to me, to see her reaction :)

It was nice to sew for someone else for a change (something besides a receiving blanket, that is ;)

Monday, 24 June 2013

Vogue 1224


This pattern, Vogue 1224, is a much-loved favourite on Patternreview.com. There have been a great many ladies who have made fantastic versions of this dress. I admit, I've overlooked it in the past, and only really became interested in making my own after seeing the posted reviews. Not that I don't like the pattern envelope photo, but sometimes enthusiasm is catching, it just took me a while to catch on ;) My review on P.R. here.

Vogue 1224 envelope on my cork board (that I  also stick up my pattern
instructions while sewing :)

Love this print!! :)

About the fabric: It's a polyester/spandex knit from Fabricville. I just love all the different colours! My last sewing project prior to this one, was a disappointment (Mccall's 6752). There are a few favorable reviews on PR, I think it was more of a "not for me" pattern, more so than a "this pattern is awful" pattern :) Oh well!

I have other projects I need to do, but I wanted to sew up a "quick gratification" project (notice I didn't say "immediate", I haven't gotten to that speed level yet :)


My crazy cat being pesty while I sew. At one point I had to put him on the floor. He was getting a little too interested in the thread while I was sewing, and would bat at my hand when I manually turned the hand wheel :) Bad kitty!

This dress was pretty straight forward, so I don't have to go into much detail here. The only thing was pressing areas for the elastic casing along the neckline and pressing up the hem on the sleeves. My fabric doesn't like to hold a crease easily, so I made sure I pressed well, and used hockey pucks (my sewing room staple!) to help set it better (I guess you'd use a clapper in the same way?).


Many of you probably do this already, but I find it easy to pin my projects to my ironing board when pressing. Makes it much easier to measure hems and such :)
Hockey pucks helping to set crease after pressing :)


 One thing I did differently for this pattern is that I used the seam allowance at the waistline seam to create a casing instead of making a separate casing, as the pattern instructs. Many reviewers chose this method and I think it makes for less bulk at the waist :)

The skirt is lined which I really like! I think its a polyester knit. I picked it up in the bargain section.


I added 2" to the length of the skirt. As many reviewers pointed out, this dress is short! I used steam a seam lite2 on the hem and then top stitched with a stretch stitch. Usually I use a double needle, but I was getting antsy to be finished this project.


I also must add, the sleeves are "bat-wing" type sleeves.
They have a line of stitching that goes on the outside of the dress towards the armpit. I didn't think the stitching went high enough. I added at least 2", and probably could've added a bit more. the pen is pointing to where the pattern says to sew it, and like I just mentioned, I sewed 2" more.


My wonderful husband put this photo together for me especially for facebook ;) . I just love it! :)

Thursday, 20 June 2013

New Look 6210


A little wrinkly, but I wore it out at least twice before taking this photo :)

I just love easy-to-wear summer dresses, like this one from New Look. It's a very current release, but I'm sure there are plenty of similar versions out there in the pattern world :) I purchased this one
mainly because I wanted a sleeveless v-neck dress. I finished it over a week ago and I've already gotten a lot of wear out of it. :)


There's something irresistible about tissue paper and fabric... :)


I chose a blue cotton-lycra knit for this dress. The fabric I picked up in the bargain section of my local Fabricville for less than $2.99/meter. I later purchased about a meter remnant of the same fabric for 75 cents! :)


For all my love of sewing with knits, cotton/lycra knit has given me the most trouble in the past. I feel like I finally figured out how to sew it properly!! Yay! :) In past attempts with CL knit, the seams would end up stretched out and wonky, screaming of "homemade" (and not the good kind of "homemade"). Obviously, if you have a serger, that would be ideal. If you don't, here's how to do it with just a regular sewing machine :)


What I did, was use straight basting stitches and then trim close to the stitching.


....Next I changed the presser foot to use the overlock stitch. Result: NO wonky stretched stitches!!

For all those thinking, "a serger would be a lot easier", yes, I agree! But for those who either don't own a serger, or don't know how to use one yet, this should suffice :) I think it looks pretty good :)


My biggest beef with this pattern is that it starts at a size 10. It would be nice if it started at a 6 or 8, then I may have been able to sew it straight from the envelope without having to make any adjustments. I had to take in the back (as shown in this photo to the right).

I also had to sew darts at the bust area for a better fit. I didn't take any photos though I wish I would have. Maybe a shoulder slope adjustment would've helped too (the shoulder/armhole area kind of stuck out a little.


The instructions tell you to sew two rows of stitching along certain seams. I used a double-needle instead. I think it makes for a much more RTW look, and saves time (I'm all for efficiency!) :)


I'm really pleased with how the hem turned out. I deviated from the instructions and tried to copy a RTW hem.


Here I used a certain stretch stitch on my machine, sewing where I wanted the top stitching to be (once the area was pressed, and then sewn on the right side. Hopefully the photos help more so than my attempts at trying to explain :)


I used two slightly different shades of blue for the hem, and where I used a double-needle, but unless you look closely, you can't really notice :)


Once I top stitched, I trimmed the excess fabric where I pressed up the hem.


I could stand to make a few more casual summer dresses like this. I will get a LOT of wear out of this dress! :)

Liebster stuff... :)

I am really behind on my blogging! About a month ago (or so) Jessie, aka: the some times sewist, nominated me for the Liebster Award. It's an award bloggers can give to other bloggers as long as they have less than 200 followers.  Jessie chose 7 bloggers she liked and here's what she wrote about me:

7. Rikki of Rikki Sews:  She may be a fairly new blogger, but it’s obvious she’s definitely had some quality time with sewing for a while.  This petite lady has blogged a few rockin’ knit dresses…and you all know what a big fan I am of knits!  She’s another person I found from Pattern Review!  :)
Liebster  post on Jessie's blog :)
I still consider myself somewhat of a beginner, so it was pretty neat to be recognized by someone I admire :) Jessie is very talented, and I enjoy seeing her creations on P.R. I'm pretty late here posting my answers to the questions Jessie posted, but here they are :)


1. If you could spend an afternoon sewing with anyone in history, dead or alive, who would it be and why?
If I could spend an afternoon sewing with anyone, it would be my grandmother, Emily Fougere. She passed away over 10 years ago. She truly loved to sew, on an old-fashioned peddle Singer, so less! She had a doll at her house for us kids to play with when we visited, for which I made a few outfits from old clothing fabric. She got a kick out that & she used to say I'd become a seamstress. I think she would have enjoyed seeing me take up sewing like I have these past couple years (I'm actually sewing clothes I can confidently wear in public! I like to think she'd be proud of me :)
2. If you could have up to five yards of any fabric in the world for free, what would you choose? (“Bonus” points for a picture)
Only 5 yards!? How can I decide?? :) Hmm, I absolutely love knits, so probably a nice silk jersey (I've only heard of it, my local fabric store doesn't carry it, but it sounds decadent, haha :)

I absolutely LOVE fabric, so its hard to settle on any one print. I can get "starry-eyed" when I go into fabric stores! :) I remember once I went into Fabricville with the intention of purchasing a particular print, but once I got in, the store had their new Spring selections out, and I was so overwhelmed, I left after an hour because I couldn't decide on anything!
3. What would you make with the mythical unicorn-like fabric from question 2?
Hmm, a dress of course! I have so many ideas on the go I wouldn't know where to start :) Probably a faux wrap dress of some sort.
4. What’s your favorite fruit or vegetable?
I would have to say bananas! I use them for PB & banana sandwiches, smoothies, muffins or just plain snacking :) Bananas are awesome. They're also yellow, one of my favorite colours (not that it has anything to do with the taste mind you) :)
5. What’s your favorite non-sewing project of all time?
Hmm, well, one of them would have to be my wedding shoes. I looked all over the place for glittery purple heels, but couldn't find any. I purchased an inexpensive pair of black heels from Walmart and "painted" purple glitter mixed with glue over the shoes! I thought they were pretty cool! :)

With my sisters (also my wedding party :)


6. What’s your favorite aspect of sewing?
Sewing is such a great creative outlet. I love the freedom to create whatever style I want in the fabric I choose. It's so exciting  and rewarding seeing a garment come together. Nice to say "yes, thanks, I made this :)". I think that's more than "one" favorite aspect of sewing (sorry I got carried away!).
7. What’s your dream job?
If I could sew for "myself" and get paid for it, that would be amazing! Sigh, no such job will ever exist :(
8. What’s your favorite era in fashion, and why?
My favorite era is now. The way I look at it, if I admire some kind of fashion, whether or not it's currently "in style", I'll make it anyway! There's always an occasion for everything, as long as its appropriate. I wouldn't kid myself and wear something ridiculous (unless it was Halloween maybe ;) Seriously though, there are some beautiful "vintage" patterns that have been re-released, so why not just make what you want? I think I have a good sense of what suits me :)
9. Is there any type of clothing that you’ve always wanted to try making but have never attempted? If yes, what is it?  Also, what’s stopping ya?
Jeans! They really are on my to-do list. I'll probably wait til the fall (summer dresses are at the top of my list). I find it difficult to find RTW jeans that fit right and are in the style I want, so I'd love to sew up my own pair(s). Plus, it sounds like a fun challenge! :)
10. What’s your favorite part of blogging?
I love writing blog posts! It's so much fun posting photos and writing about my sewing experiences. I don't write a post usually, unless I've just finished an outfit, so I don't have dozens of posts yet, but I try to aim for quality on the posts I do write up. I try to make them enjoyable for people to read. When I started though, I said to my husband that if I was the only one reading my blog, I would still do it, just because its so much fun! I do very much appreciate comments and feedback from others (I'm like "Wow! Somebody likes my blog! ;)