
Yes, that's right, my first maternity top! Baby and I just passed the 5 month mark, and the little one is set to arrive near the end of May :)
Before I go on about my top, I have to take a moment and gush a little. This is my first pregnancy and I'm really enjoying it (yes, *really*:) It's been an amazing experience! Oh, believe me, I've experienced my bouts with morning sickness, although thankfully, it only lasted for the first few weeks. We were able to keep it on the DL, which I was grateful for because baby was a Christmas announcement:) This is how we told the grandparents....(we gave one potato to each set of grandparents).
The note on the sweet potato says, "This is how big your grandchild is." It was wrapped up in a little box. They were all thrilled to say the least!:)
 |
| This is also how we announced our news on Facebook. It was a big hit:) |

It didn't take very long before my wardrobe got to be pretty limited. This grey top (above) that I'm wearing, I bought at a thrift store. It's from The Gap, and it's loose fitting and very comfortable. I liked it so much, I wanted to copy it. Since announcing my pregnancy, my mom has generously bought me a bunch of beautiful maternity clothes, plus a co-worker gave me some great clothes as well, so I don't really have to make anything maternity. *However*, I think I'd go a little batty if I stopped sewing for myself until after baby comes! I'm going to make myself *a few* things;) Next up is a cardigan and wrap dress. But for now, lets get on with my striped number;)


Shown in these two photos here, I have a padded surface (a length of fabric folded a few times), then the tracing paper and the top (inside out, so its easier to see the seam line). With the help a tracing wheel, I soon had my pattern:)

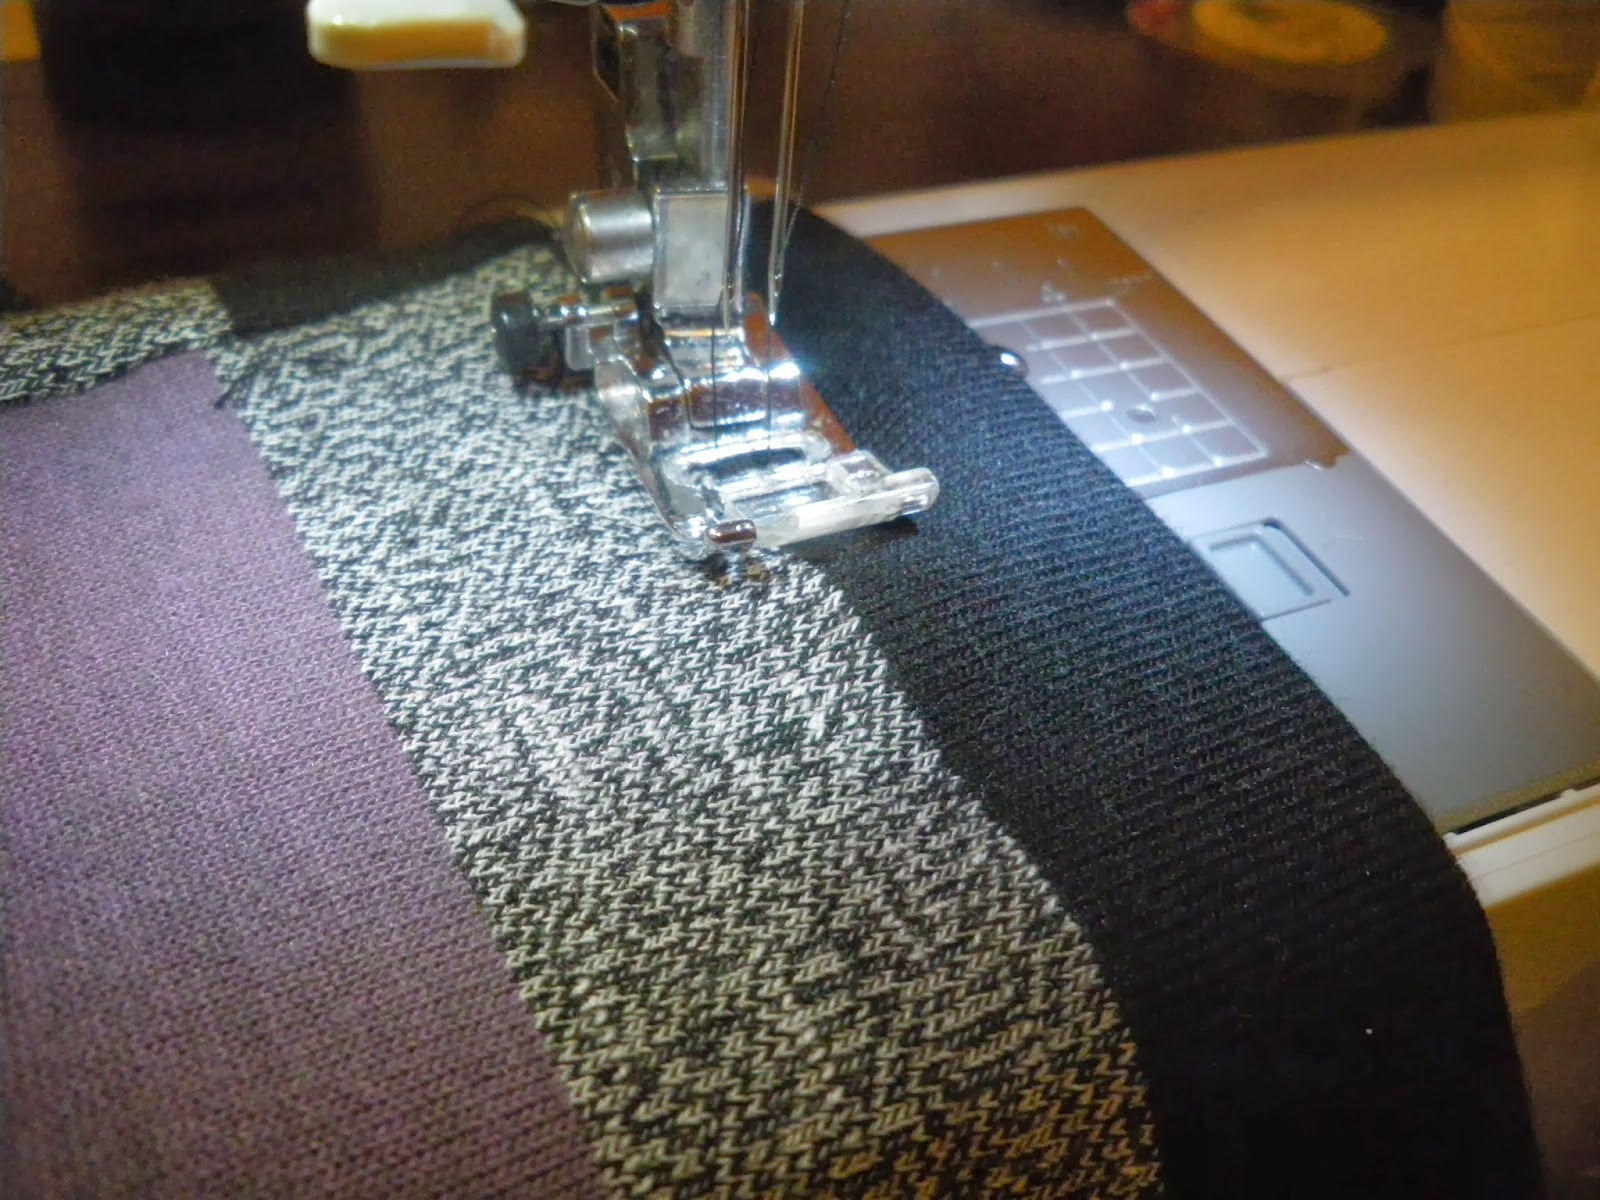
After a quick muslin I was set (or so I thought). This was my first time matching stripes, so I used lots of pins so the fabric wouldn't shift. I used my usual hockey-puck pattern weights also:)
This beautiful black/grey/lilac fabric is rayon/polyester/spandex blend. It drapes so well and is very soft and cozy. Almost a "sweater knit type". It's from Fabricville (of course);) I purchased it with this top in mind:)

I stabilized the shoulder seam with twill tape (for the muslin I used an old lace seam binding, but it was scratchy and annoying, I learned my lesson!) The twill tape is great, I don't even notice its there.

After sewing the shoulder seams, I sewed in the sleeves flat (so much easier than in-the-round). It also makes it easier to adjust the side seams if necessary (which I ended up doing).

Here is the under-arm seam stripe matching, which I was pretty pleased with.

Here to the right is the not-so-great side seam stripe "matching". I forgot that the shoulder seam of front pattern piece extends forward more. I should have accounted for that when I was laying out my pattern pieces:/ When I made my muslin, it was a solid colour, so I didn't have to worry about matching stripes.
Oh well!:/

For the neck binding, I decided to make it grey. I marked an inch on the grey part and added a 5/8" seam allowance on either side, so the resulting finished binding would be 1/2" wide.
The binding was a few inches shorter than the neckline to ensure a snug fit:) I simply measured along the top of the binding of my RTW shirt to figure out how long to cut it (plus seam allowances of course).

I was almost finished my top, but the result wasn't quite as flattering as I had hoped. Stripes on my pregnant belly looked far better in a fitted shape, so I took in the side seams and added side ruching using this top from Old Navy (thanks mom!:) as a guide.


In these two photos you can see where I marked the new seam line (again, using lots of pins to make sure the stripes "matched").
In this photo to the right I had sewn along the newly marked seam line and then trimmed the seam allowance, using an overlock stitch to finish the seams.
 |
| Here I measured the length of elastic, about 6.5". I stretched out the elastic and it took in about 9.25" of fabric. |
 |
| Elastic marked & pinned |
 |
| Here, I'm stretching the 1/4" elastic as I sew to create ruching. I tried using a zigzag stitch but it didn't work so well. I used a straight stitch and it worked great!:) |
 |
| Elastic-made ruching:) |
 |
| I used steam a seam lite 2 on the hem and topstitched with a double needle. Gotta love steam a seam, gave it some extra stability to help prevent puckering. |
 |
| On the original top, the sleeves are rolled up and tacked at a couple of spots. I rolled up the sleeves and used steam a seam lite 2 to secure, as tacking wasn't looking so great. I may slipstitch the cuff at some point, but for now SAS will do:) |
 |
| The finished top, I just love it!:) |
And, again, here it is on me. I have a few more projects in the works, so hopefully it won't be too long before my next blog post! Happy sewing!:)
Congratulations! In my experience, the 2nd trimester is the most fun. Also, your top looks great!
ReplyDeleteThanks Beth!:)
DeleteCongratulations -- babies are so wonderful! I did notice that there are a couple of nursing/maternity patterns among the new Simplicities. And it is really fun to sew for babies:)
ReplyDeleteThanks Angela:) Yes, I'll have to snatch up those patterns next sale:)
DeleteCongratulations Rikki. Love your stripy top. You will have lots of sewing opportunities coming up, I am sure.
ReplyDeleteThanks Jean! I'm sure I will:)
DeleteI was thinking to myself when I saw the PR review, I think this is her first :)
ReplyDeleteCongrats and welcome to motherhood! You are absolutely glowing! Enjoy the rest of your pregnancy and YAY! baby sewing!!!! :)
Thanks Mrs.Smith!:) haha, you were right about it being my first! Very excited for this little one:)
Delete