You knit me together in my mother's womb.
I praise You because I am fearfully and wonderfully made;
Your works are wonderful,
I know that full well.
My frame was not hidden from You
when I was made in the secret place,
when I was woven together in the depths of the earth."
Psalm 139:13-15

Feels like it's been *forever* since I made myself a dress, well a wrap dress anyhow. It wasn't long after I found out that I was pregnant that I stopped wearing my beautiful fitted (i.e. tight) dresses.
One nice thing about my changing pregnancy shape, is that it's a great excuse to sew up some new church dresses:) I wore this one yesterday and got some nice compliments, notably how "cute" I was (I always wanted to be one of those "cute pregnant women"). It's nice to be cute *and* fashionable;) I really like my new maternity wrap dress and will most likely make another from this pattern.
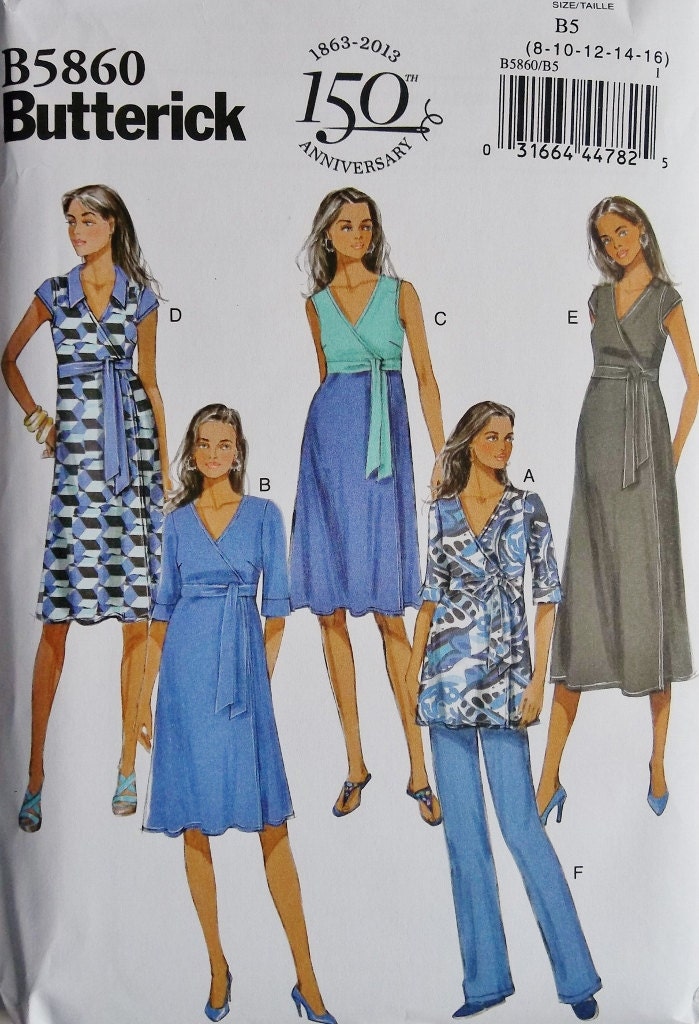
Here she is:) I will note, I'm a bit confused with view"C" because Butterick doesn't provide separate pattern pieces for the colour-block effect you see. Which is a shame, because it looks pretty cool. I suppose it wouldn't be difficult to adjust the pattern, but they should at least provide the pieces for you if they're showing it on the envelope:(

I call this my "watercolour" dress because I think it looks like a watercolour design fabric. It's a polyester/spandex blend that I picked it up at Fabricville.
I must add, their Spring collection is *AMAZING*! Is it possible to hyperventilate in a fabric store?? Because I think I did when I went in there a couple weeks ago and feasted my eyes on their new fabrics. I was so engrossed in the sea of gorgeousness that I was late picking my husband up from work! :)
 |
| Laid-out pattern pieces. |
 |
| Boris playing with balled up tissue scraps:) They just can't resist the crinkle;) |
 |
| Caper hanging out while I cut pattern pieces. |

Here to the right, I have my trusty marking device of choice: Crayola Washable Marker. They're so great! I don't have to worry about the mark fading until after I wash it.
Seems like there was A LOT of marking for this pattern. Next time I cut out fabric for this dress, I'll flip the fabric and pattern piece to the wrong sides so I'm marking on the back. I always transfer the markings to that side anyway, so it'll save time.

One thing I changed about this dress was in finishing the neckline. The pattern calls for a facing, but I decided to use the piece for a binding instead. I accidentally threw out my original facing piece and I didn't have enough fabric for a full length strip, so I cut two 2" wide strips and had to sew them together.
I used a 1/2" seam allowance when sewing the binding to the neckline (instead of 5/8"). Sewn as-is the neckline (in my opinion) was too revealing. I found even with the binding it was a little too plunging for my taste. The only pattern I've ever used that the neckline was perfect, was McCalls 6163. Since I've bound a number of necklines, I just kinda "winged it", stretching the binding slightly as I pinned it to the crossover pieces.


Looks like a serger stitch, which I like:)
 |
| Binding from the wrong side. |
 |
| Binding from the right side, isn't it pretty? :) |
 |
The ties for this dress were slightly different lengths, so I found it very helpful to label them so I wouldn't get them mixed up.
Another thing, I cut a size 10 in this pattern, but cut a size 16 (largest size in my envelope) for the ties and they still could've been a bit longer. If there's one thing I *don't* like, it's short ties on a wrap dress!:p

Not perfect, but this is how I dealt with the binding ends near the ties. Steam a seam lite 2 was very helpful. I used it on the hem as well:)

I don't have a photo, but I sewed a snap at the neckline crossover for modesty's sake:) I didn't want to have to wear a camisole underneath. I lengthened the sleeves, because I didn't want cuffs. However, I didn't lengthen them enough and had to add cuffs anyway (though not split as shown on the pattern).
And, again, here is the finished dress:) Up next, I must get to my cardigan, then probably another dress!;) Happy Sewing all!


Really, really cute! And your binding looks excellent:)
ReplyDeleteThanks Angela!:)
DeleteYOU are really cute and the DRESS is really beautiful (fit, color, and style). You make an AWESOME PAIR! Your finishing techniques are beautiful. Why is it that wrap around dresses have such a plunging neckline?!
ReplyDeleteThanks Kathy!:) I think pattern designers must just like plunging necklines!:)
DeleteThat's a great dress. Congratulations on your pregnancy Rikki!
ReplyDeleteKathleen
Thanks Scarf;)
DeleteBeautiful dress. Love all the construction details and tips.
ReplyDeleteThanks Jean:)
Deleteyour dress is gorgeous. As are you! Pregnancy suits you :)x
ReplyDeleteThanks Mrs. Winter! ;)
ReplyDeleteI love the dress it looks lovely on you! :) When I make a wrap dress I will have to remember the trick of sewing a snap in!
ReplyDeleteThank you:)
ReplyDeleteYou are a stylist mom to be. Love it!
ReplyDeleteThanks Cennetta!:)
Delete