Monday, 3 April 2017

Floral Bomber, Part 2 (Lining)

"I tell you, everyone who confesses Me before men, the Son of Man will also confess him  before the angels of God. But whoever denies Me before men will be denied before the angels of God."

Luke 12:8-9


      Happy Monday everybody:) I've learned so much during this project & even though it was confusing at times, I've really come to understand just how simple it is to line a jacket by machine (with as little hand-sewing as little as possible, lol:)

I took a few photos of the process (now that I'm done and looking back, I made it *far* more complicated than it needed to be! I did my own thing in attaching the waistband & lining so I'll try to explain this as clearly as possible. There's a few construction step photos I deleted by mistake! Hope this helps someone anyway:p


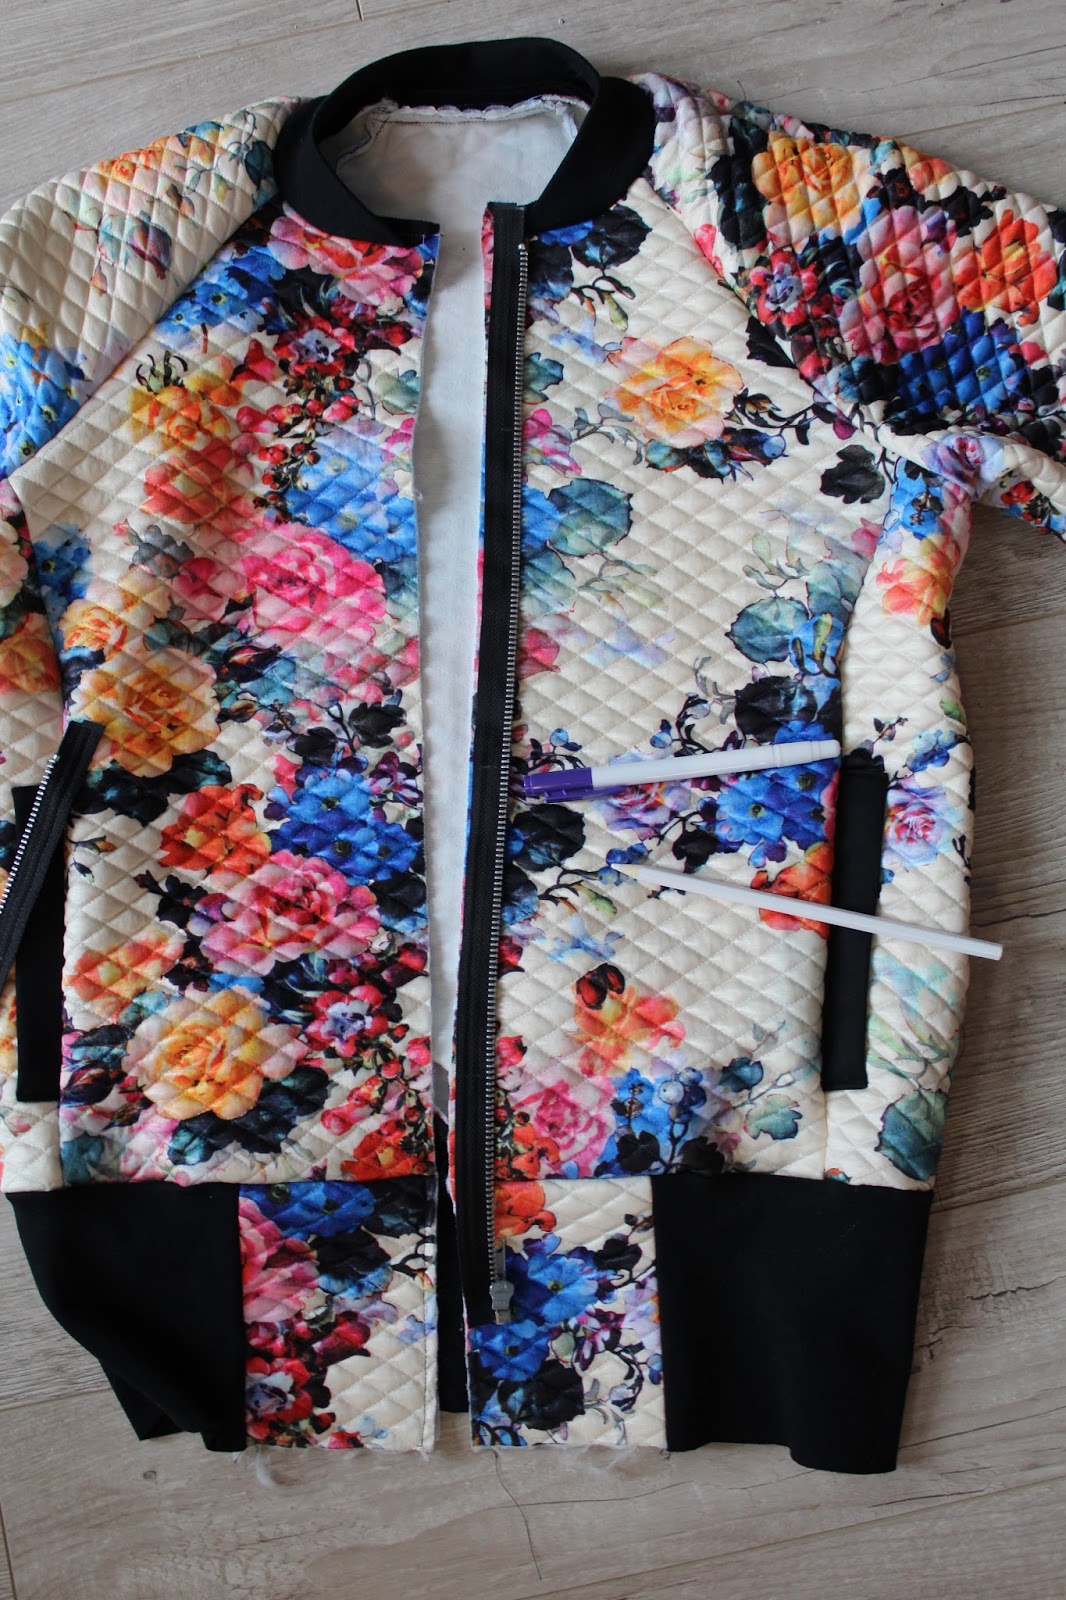
   As I showed in my last post, I attached the black waistband to the front (floral) bands and then to the main jacket & inserted the zipper (don't topstitch the zipper yet!).

I used the same main body pattern pieces (front, side front, back & sleeves) and attached the front facing piece directly onto the front pieces of the lining.

(In hindsight I wish I had left that facing piece off the lining, since it made the zipper area very bulky and difficult to topstitch afterwards. Maybe I didn't trim seams enough??)


I then attached the lining to the waist-band at the bottom all the way across, right-sides-together.


This next step is bringing the seam allowances of either side of the waist-band together and sewing between the front (floral) bands.

 I think it'll make more sense if you actually have a jacket you're working on. If in doubt, hand-baste it at first so its easy to remove the stitches if you make a mistake! (I did lots of basting!:) You could also use pins and act out the steps as well! I *hate* having to unpick stitches!


I referred to Kelly's kids bomber jacket tutorial blog post a lot while trying to figure out how to attach the lining to my particular jacket. Very helpful!

 I purchased Kelly's 12month-12 year kids Bomber Jacket pattern & I can't wait to use it for my boys!! She has a free 2T pattern available as well! I was inspired to use a quilted knit after finding her post (I think its the exact same fabric too!:)


  Here, the jacket and lining are placed right-sides-together. I found it helpful to pin it at the top first, then line up the rest. I sewed up both sides of the zipper and then up around the collar.

I pulled the jacket right side out to make sure everything looked ok, then turned it inside out again to trim seams.


   I turned up the sleeve seam allowance and tacked it in a couple places (so I wouldn't get the sleeve twisted and attached weird later lol) & pulled out the sleeves through the opening I left for turning and machine sewed the lining to the cuff.


   I did topstitch the zipper (it was very bulky with the facing) but just stitched in the ditch of the seams around the bottom band. The final step was sewing the hole closed (that I left for turning the jacket right-side-out) and clipping any loose threads. Next post will just be of me wearing my jacket!:D

Saturday, 25 March 2017

Grannie-Chic Bomber Jacket (Part 1)

“The Father loves the Son and has placed everything in his hands. Whoever believes in the Son has eternal life, but whoever rejects the Son will not see life, for God’s wrath remains on them.”
‭‭
John‬ ‭3:35-36‬


    Hey everyone:) I decided to divide up this blog post into at least two parts. I thought it might be helpful to share photos showing how I lined up the front print with the zipper. I didn't want to drive myself crazy trying to make it perfect but I think it looks pretty good if I do say so myself!:)

  Please be aware that I'm using a different method than the pattern instructions recommend. I'm adding a lining and wanted to use a different method than my last jacket (thats my disclaimer, lol). I'll hopefully do a more thorough review once my jacket is complete:).


    My fabric is a beautiful quilted-knit I got from Fabricville. My sister jokingly referred to it as "Grannie-chic", hence the title;) The fabric reminds me of our grandmother who loved to sew and made lots of quilts. We affectionately referred to her as "Grannie"). She certainly was a big influence on me taking an interest in sewing.

The pattern didn't call for it, but I (very lightly & carefully)  added a narrow strip of knit interfacing to help stabilize the zipper area.
 
    First, I laid the jacket down and positioned the zipper where it should be before basting. I then marked the *back* of the zipper with a white marking pencil at three different spots (you could do more if you wanted to be *really* accurate. For me, three was enough.


   I found it easiest to just mark one side at a time with the purple marking pen.


      I took my jacket to my ironing bord (less slippery than the floor!) and lined up the print as best I could & used a clear ruler to draw a line across to the other side.


    I used basting tape to position the zipper & it made it adjust. I didn't take a photo of that step but the zipper is inserted as instructed (for an exposed zipper).

I sill need to sew it in place but looks pretty cool eh?:)

Monday, 13 March 2017

Floral McCalls 6886

"Now may the God of peace, who through the blood of the eternal covenant brought back from the dead our Lord Jesus, the great Shepherd of the sheep, equip you with every good thing to do His will. And may He accomplish in us what is pleasing in His sight through Jesus Christ, to whom be glory forever and ever. Amen."
Hebrews 13:20-21


        Anyone else getting a bit tired of Winter? I know I am & since Spring is just around the corner I decided to make a quick dress with McCalls 6886. This time, however, I didn't bother to adjust the back like my green cowl version (laziness). I did change the sleeves though, to look more like my favourite RTW shirt. I also added a bias-cut neck band instead of the instructed turn-under-hem. I trimmed off the 5/8" hem allowance from the dress before adding the band. I used a 3/8" SA & the finished band was about 5/8" (the band strip was 2" wide before folding lengthwise and the cut about 10% less than the neck opening.) I think I may remove the sleeve cap ease next dress.


       I simply used Steam-a-Seam lite2 on the bottom hem. I used it on the sleeve too and topstitched with a twin needle. There is a bit of tunnelling (bah), so I opted not to topstitch the bottom. I'm definitely going to wear this dress a lot once the weather is better, but I think I made it a tad too short:p I can see myself making several more of these for summer, so I'll keep that in mind for future versions.


My cute little photo-bomber:)


       I looove this dress! Its a great wardrobe builder and an "instant-gratification" project to boot!:) My next item in the works is a second McCalls bomber jacket, this time in a quilted floral print knit!! I definitely have flowers on the brain, lol:) Bye for now!


Wednesday, 8 March 2017

DIY Cape


"After this, Jesus travelled about from one town and village to another proclaiming the good news of the kingdom of God. The twelve were with Him, and also some women who had been cured of evil spirits and diseases: Mary (called Magdalene) from whom seven demons had come out; Joanna the wife of Cuza, the manager of Herod's household; Susanna; and many others. These women were helping to support them out of their own means."

  Luke 8:1-3


      Hey y'all!!! I'm very excited about my latest make!! This super-easy DIY Asymmetrical Cape is from a post Margo had on her blog. I liked her "Lumberjack Chic" version so much I got a fabric in a similar plaid. Imitation is the sincerest form of flattery after all;) This is one of those truly "instant gratification" projects. Basically a rectangle of fabric, folded with a zipper on one side.


     I recently made this "carseat poncho"for my son using the same idea (minus the fringe & zipper). Since the fleece is stretchy, I just left an opening big enough for his head to poke through!:) Its very handy to get him to and from the car. I take it right off once he's buckled in though, otherwise he would get too hot. I love it & I use it all the time!:)


   Hmmm, I may make another with large button holes to pull a belt through and cinch it at the waist!
Exposed zipper & edges fringed:)


Well, thats all for today folks! Next blog post will be another McCalls 6886 t-shirt dress. Til next time!:)

Friday, 24 February 2017

McCalls 7477 (flop) & Easy Carseat Poncho

"I want to know Christ and the power of His resurrection and the fellowship of His sufferings, being conformed to Him in His death, so that I may somehow attain to the resurrection from the dead.
Not that I have already obtained all this, or have already been perfected, but I press on to take hold of that for which Christ Jesus took hold of me. Brothers, I do not consider myself yet to have laid hold of it. But one thing I do: Forgetting what is behind and straining toward what is ahead, I press on toward the goal of God's heavenly calling in Christ Jesus."

Philippians 3:10-14


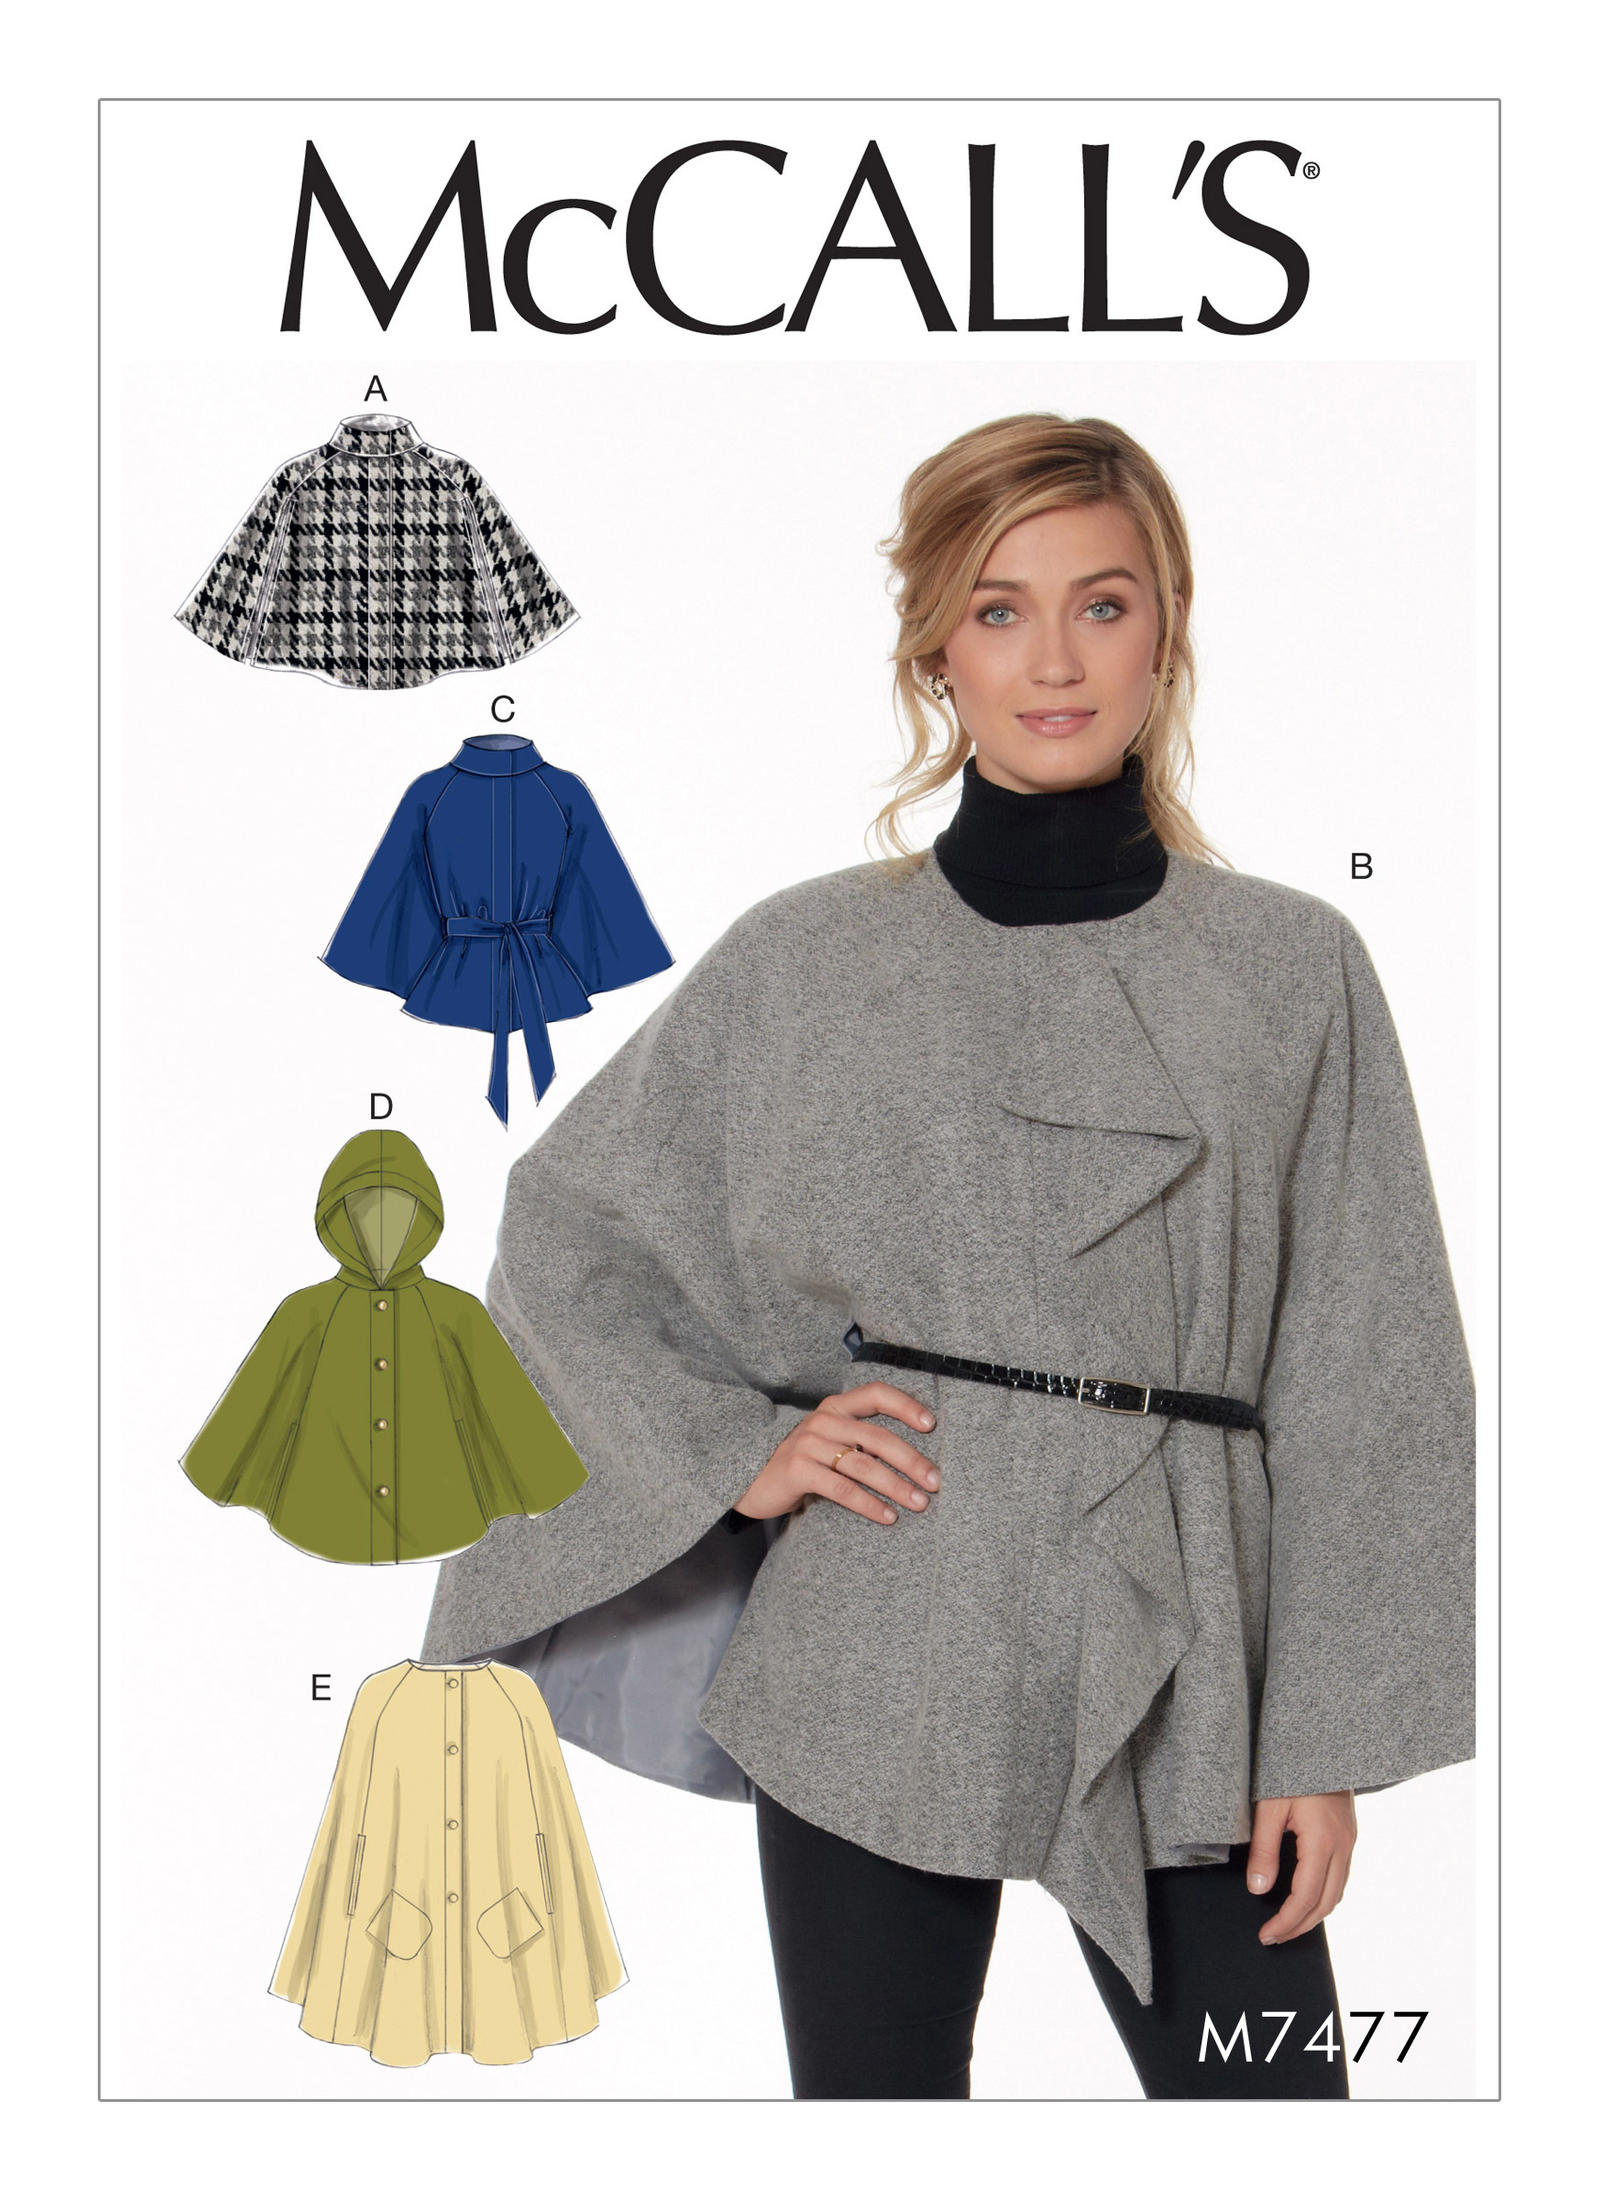
    Hey y'all:) May I present my latest sewing fail:p You know its bad when I take the photo taken on my dummy & not myself! I was *so* excited about making myself a cape, but this one's just not flattering on me:(

    I find theres too much fabric around the waist & looks too bulky when gathered with the belt. Maybe my fabric is too thick? I don't know. I cut the S but I don't think the XS would have made enough difference. Maybe if I feel ambitious I may try the pattern again after altering the pieces for a more tailored look.


I absolutely fell in love with view C :(


    I just adore the print of this lining fabric! I picked it up at a thrift store & I still have enough for a different jacket!:)

The grey wool I've had in my stash *forever*.


     After my cape flop, I quickly made this "instant gratification" fleece "carseat poncho" for my son. I actually made one with the same blue fabric for an elderly friend last year after she injured her arm. She loved it!:). I borrowed the idea from the lovely Margo of creating in the gap:)

    Margo's has a zipper, but I didn't even need one for this one since the fleece stretches.  ***Important***, I take this poncho off once I get him buckled in, otherwise he will get too hot. Fleece is warmer than you think, even with just one layer.


The poncho is basically a rectangle of fabric, folded in half with a seam down the side, less a few inches to allow a head to poke through:) The long side is double whatever your child's side measurement is (from the side of the neck to knees). I didn't finish the neck opening but turned the seam allowance down and reinforced the area with a few stitches.


And here is the poncho turned right side out:)


   I think I may get some chic fabric and make one for myself!;)

Wednesday, 4 January 2017

Video Game-Inspired Plushies:)


Thus says the LORD, “Let not a wise man boast of his wisdom, and let not the mighty man boast of his might, let not a rich man boast of his riches; but let him who boasts boast of this, that he understands and knows Me, that I am the LORD who exercises lovingkindness, justice and righteousness on earth; for I delight in these things,” declares the LORD.

Jeremiah 9:23-24


        Aren't these plushies adorable??!! Lol! I made all them as Christmas gifts for my sister who loves Mario & The Legend of Zelda. I did play old-school Nintendo when I was younger:) I made this Nintendo dress/costume a few years ago & I had a lot of fun wearing it:)


    These Luma Stars are from Mario Galaxy. Since they came in different colours, I thought it would be nice to make my sister several of them:) I think they're so cute! The pattern is from clearkid on Deviant Art. I'm not on Deviant Art myself, I came across the pattern on Pinterest.


       I got the Triforce Plush and Mario Coin Block from Cloe Knight on her website!:) She has a bunch of adorable plush patterns & she also has a cool "sewalong-type series" where you sign up and she has a new plush to sew every month. These two are from a couple of her "Freebie Friday" posts.


 Classic Mario Coin Block!:) I think my sister especially got a kick out of this one:)

        I quite enjoyed making these plushies! I had also planned on making a free "Lightning McQueen" car plush for my son that I found on Craftsy, but I didn't get around to it before Christmas:/ Its in the works now though!:) That will hopefully be my next project/blog post!

Have a great day everyone!:)

Thursday, 29 December 2016

McCalls 6886, with a twist:)


"Therefore The Lord Himself will give you a sign: the virgin will conceive and give birth to a son, and will call Him Immanuel (translated: God with us)."

Isaiah 7:14 (written approximately 700 years before Jesus was born).


        Merry Christmas all!:) Man, its been awhile since I've posted anything! I've been busy with a few gifts (which I will blog about soon!). This cowl-neck dress was my second attempt at a dress for the holidays. My first was a red turtle-neck sweater dress (which was a fail, bah). I'm pretty happy with this modified version of McCall's 6886. I picked up the pattern some time ago but I knew I would have to make some kind of sway-back alteration. I used another pattern to help with the curve. I'm not entirely satisfied with it but it'll do! The belt really helps!:) I'll have to make another adjustment next time.


         For the "shifted cowl", I got the instructions from my "Singer Sewing with Knits" book. The cowl is a rectangle of fabric, the neck's width on the opening of whatever dress/top pattern you're using,  and 15" high, plus SA. The cowl piece ends up being a tube with a center-back seam. I folded the cowl wrong sides together, first lining up the CB seam, then "shifting"it a bit. The two white pins (below) are pinned at either side of the CB seam of the cowl. I didn't record how much I shifted the pieces, a few inches I guess. I tried it a few times, and put the cowl piece around my neck to see how I liked it, before basting the sides together. Once I get a chance I'll show some photos of my Singer Book. Describes it better than I can:p


       The fabric is some I got from my mother-in-law!:) Its a green knit that looks like terry-cloth on the right side, and feels like fleece on the inside. Its very stretchy and easy to sew with.  I erred on the side of cutting it on the bigger size (since my last attempt at a Christmas dress was too small). I think I cut a 12. I'd definitely size down next time. I sewed the sleeves in flat so I could take in the dress a bit at the side seams if I needed to. I'll remove the sleeve-cap ease next time as well, seems unnecessary. I may also shorten this dress a few inches, since I'll likely wear it with leggings anyway. I was in a rush, so I didn't really have time to make many adjustments before Christmas.


My little Jonny:)


All the best to everyone in the New Year!:)


*** This is the book I used. I *love* this series of books! I picked up some at thrift stores & others on amazon!:)